


Smartphones have revolutionized the way we take and share photos. Easy access to a camera gives anyone and everyone the ability to become an instant photographer — especially as smartphone lenses become more and more advanced.
Yet, despite our collective ability to snap higher resolution photos than ever before, high quality does not automatically equal professional quality. Pro tips from true professionals can make a major difference — especially when taking photos of products on your business showroom floor.
Whether you use cell phone shots on social media or share them with potential customers, the end result needs to be polished.
At Spring 2025 High Point Market, professional celebrity and interior photographer, Linda Holt, led an interactive educational session titled Smartphone Tips for Better Market Photos — during which she shared practical, easy-to-apply tips that take product photos from blah to beautiful.
General Smartphone Photography Tips
The session was divided into three sections: furniture, rugs, and lighting. However, to start, our host and photography pro, Linda Holt, shared four key tips that can apply when shooting any type of home furnishing.
4 Basic Tips for Taking Really Good Photos on Your Phone
- Clean your lens. If your photos seem hazy or bright lights are creating a lengthened glare, your lens likely needs a quick clean to remove any oils. It’s okay to use your shirt or any piece of fabric.
- Don’t use a flash. Today’s smartphones are designed to automatically adjust in darker settings. Even if the image still feels dark, it is better to edit the photo after taking it than to use a flash. (Keep reading for photo editing tips!)
- Don’t use live mode. Most newer phones default to live mode (or “motion photo” if you own an Android), which means your phone will a second or two of video before and after you snap the photo. However, this can slow down the auto focus as well as take up more storage in your phone.
- Manually set the exposure. While smartphones are designed to regulate exposure — how dark or light images appear — they don’t always get it right. Shooting with backlighting, window lighting, or even artificial lighting can be tricky for your phone to optimize. Manually setting the exposure ensures that the brightest part of the photo is not too blown out.
How to Manually Set Exposure on Your Cell Phone
Unsure how to use the manual exposure feature on your phone?
- Before taking the photo, tap (don’t hold!) the brightest spot of the scene you are shooting — which will likely be a window, lamp, or other light fixture — and an exposure tool will pop up on your screen.
- Slide your finger to adjust the exposure. The goal is to regain the detail of the light source, even if that makes the object(s) you are shooting darker. It’s easier to brighten a darker spot later than it is to regain detail lost outside a window, for example. (Editing tips are still coming!)
- Once you have the exposure level set, you can hold your finger on the screen to lock your preference in place.
After sharing these general tips, Linda then moved on to show us how to shoot furniture in general.
Best Tips for Photographing Furniture with Your Smartphone
Whether you’re shooting one piece of furniture or an entire set, these are the top tips Linda shared.
How to Eliminate Distortion When Taking Photos of Furniture with Your Phone
- Don’t tilt your phone downward. This skews the perspective of the room and the furniture.
- Shoot straight on, from the same level as the piece of furniture. One exception to this rule is when you are shooting a table or countertop and want to see the objects or detail of the surface.
- Turn on the grid lines. In your phone’s camera settings (or gear icon), you’ll see an option to turn on grid lines. Using this feature will help you better shoot straight on because you can tell whether the vertical lines of the furniture are parallel and ensure that you are shooting straight horizontally.
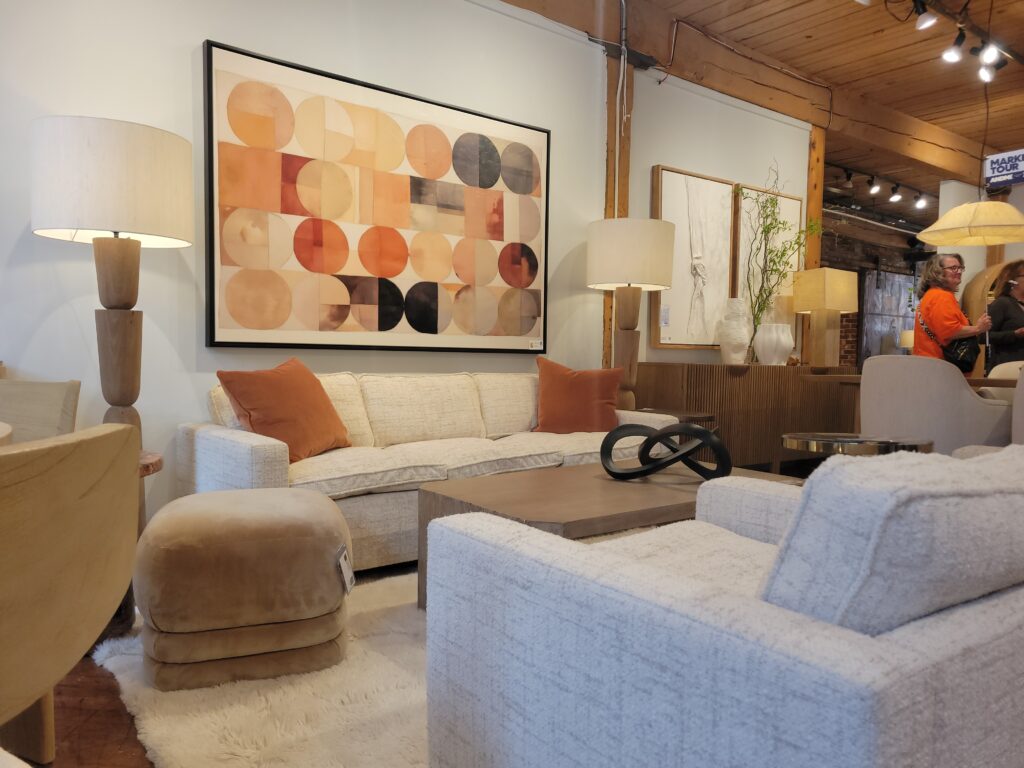
Photo credit: Jayme Muller (taken at High Point Market)
2 Best Angles for Shooting Furniture with Your Phone
According to Linda, the only two angles you shoot use to shoot furniture are:
- One-point perspective — This is the straight on angle described above, achieved with the help of your phone’s grid lines.
- Two-point perspective — This perspective should only be used when you are shooting from the corner of a piece of furniture versus straight on — either due to preference or space constraints. In this case, be sure to keep the corner as centered as possible in your shot.
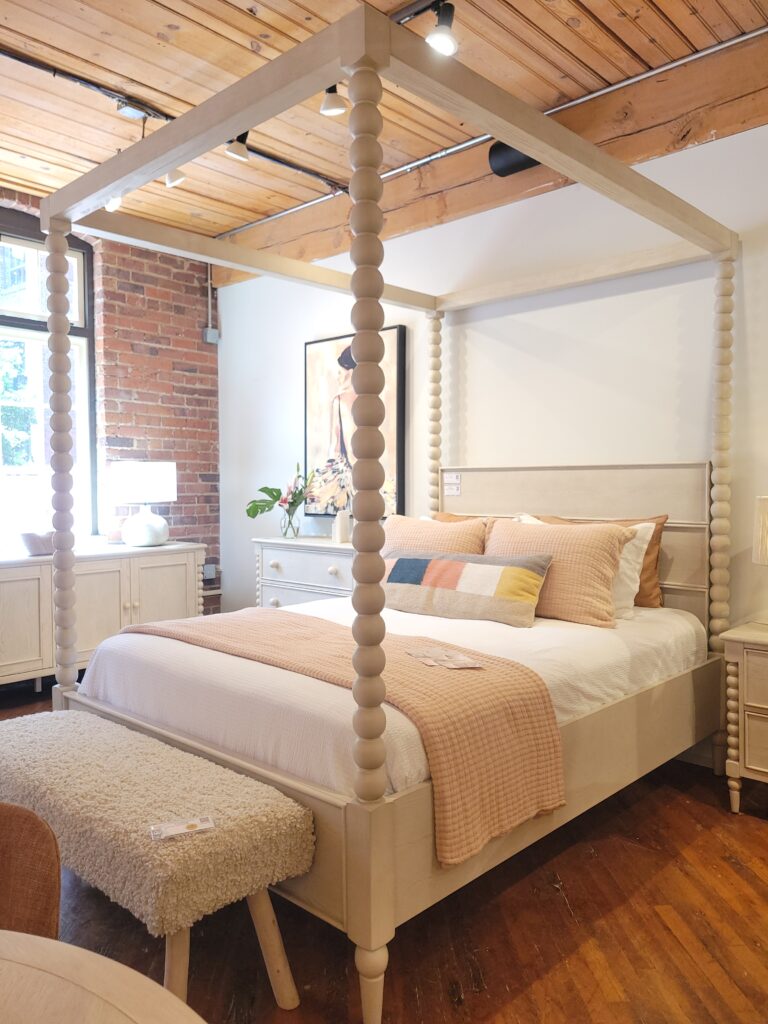
Photo credit: Jayme Muller (taken at High Point Market)
Choosing the Right Smartphone Camera Lens
Did you know? The two — or three — lenses on the back of your phone aren’t just there for aesthetics. Each lens offers different zoom capabilities.
Most newer phones are equipped with three lenses — a 0.5x (wide angle), 1x (regular), and 2x or greater (telephoto). When shooting furniture in a showroom, never use a wide-angle lens. This will distort the dimensions of the room and the piece(s) of furniture. If space allows you to back away from the product you are shooting, using a 2x or greater lens is best for eliminating distortion. Otherwise, stick with the 1x lens.
You should see these lens options on your phone screen when the camera app is open.
Using Portrait Mode with Your Smartphone
For a more professional result, use portrait mode when shooting furniture. You will find this option in your camera settings.
Portrait mode creates a vignette that keeps the foreground in focus and blurs everything else to minimize distracting, yet unavoidable background objects.
How to Shoot with a Window in the Background
Shooting around windows can be unavoidable as well, especially in a showroom. During the session, Linda offered several tips to achieve better results.
- Aim to shoot in the morning or late afternoon for less direct sunlight.
- Use the manual exposure feature mentioned above. When framing the shot, tap on the window to adjust the exposure so that the window isn’t glowing and the outdoor scene is actually visible.
- If the product looks somewhat dark after adjusting, that’s okay. You can edit the darker spots after the fact.
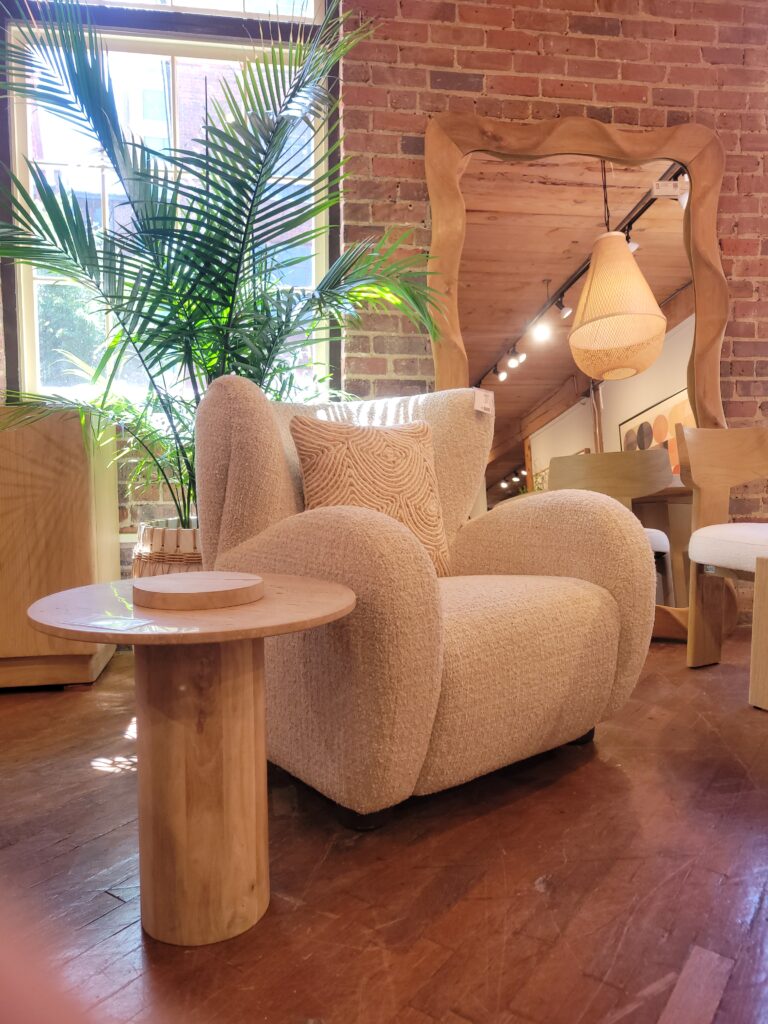
Photo credit: Jayme Muller (taken at High Point Market)
Best Free App to Edit Photos
Linda’s recommendation for photo editing on your phone is to use an app called Snapseed. Not only is it free, but it also offers many editing features, including the ability to brighten — or darken — selected parts of a photo that might need touching up.
Pro Tips for Photographing Textiles and Rugs with Your Smartphone
Typically, rugs are displayed in one of two ways: hanging or on the floor.
As with furniture, angles are important either way. Another thing to be aware of? Showroom lighting that might cast shadows.
How to Take Photos of Hanging Rugs
Linda shared that two different angles are necessary when shooting a hanging rug:
- Shoot straight on or parallel using your phone’s grid lines as a guide. This is the best way to capture a rug’s color and pattern with no distortion.
- Shoot at an angle to capture the rug’s texture. If the angle you are shooting casts shadows on the rug, try shooting with a 2x lens and stepping backwards, if possible.
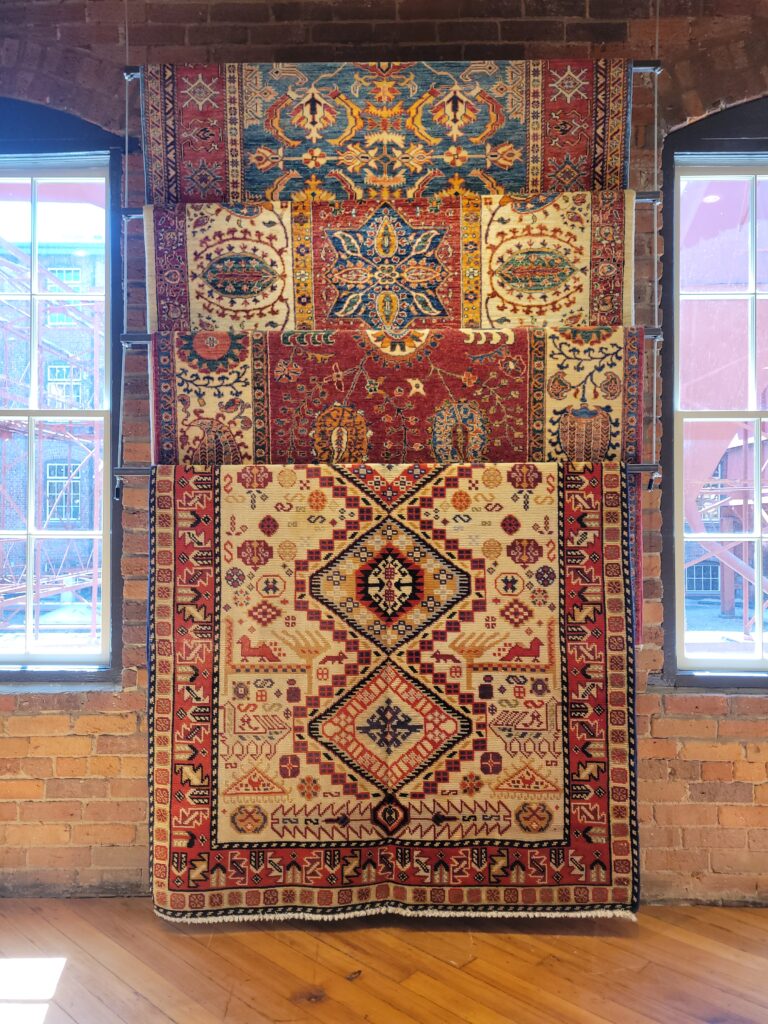
Photo credit: Jayme Muller (taken at High Point Market)
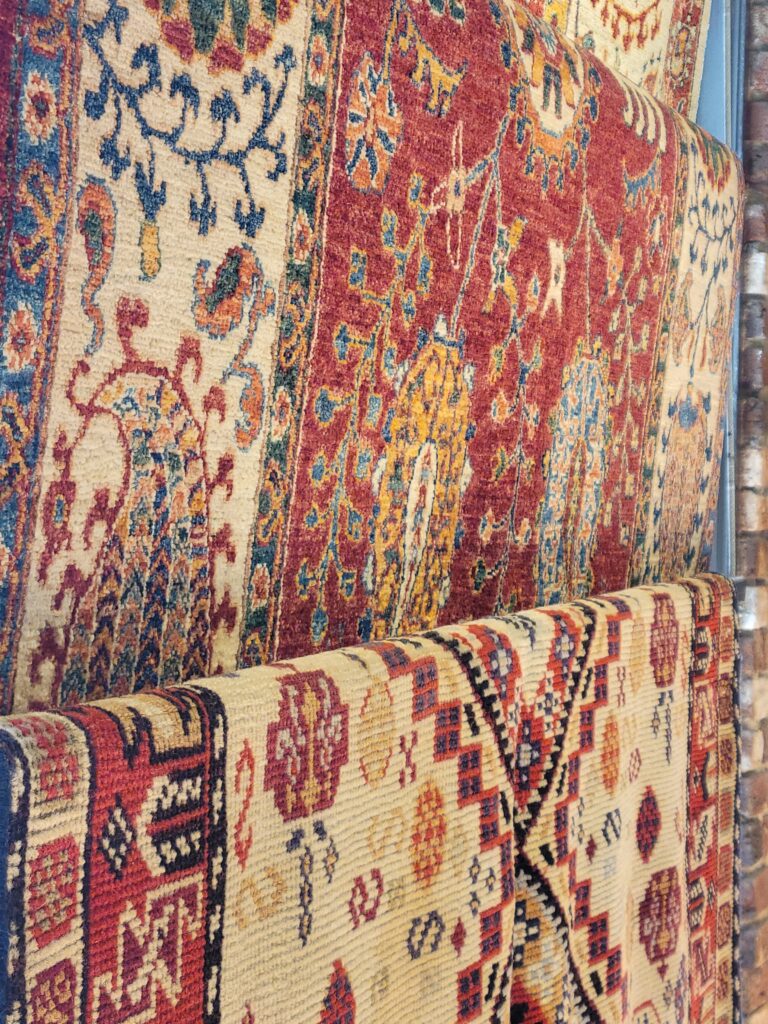
Photo credit: Jayme Muller (taken at High Point Market)
How to Take Photos of Rugs on the Floor
Similar to hanging rugs and textiles, Linda recommended shooting flat rugs two ways:
- Shoot straight down. You may not get the entire rug in the shot, but the goal is to capture the color and pattern with no distortion.
- Kneel and shoot close to the rug at an angle to focus on the texture.
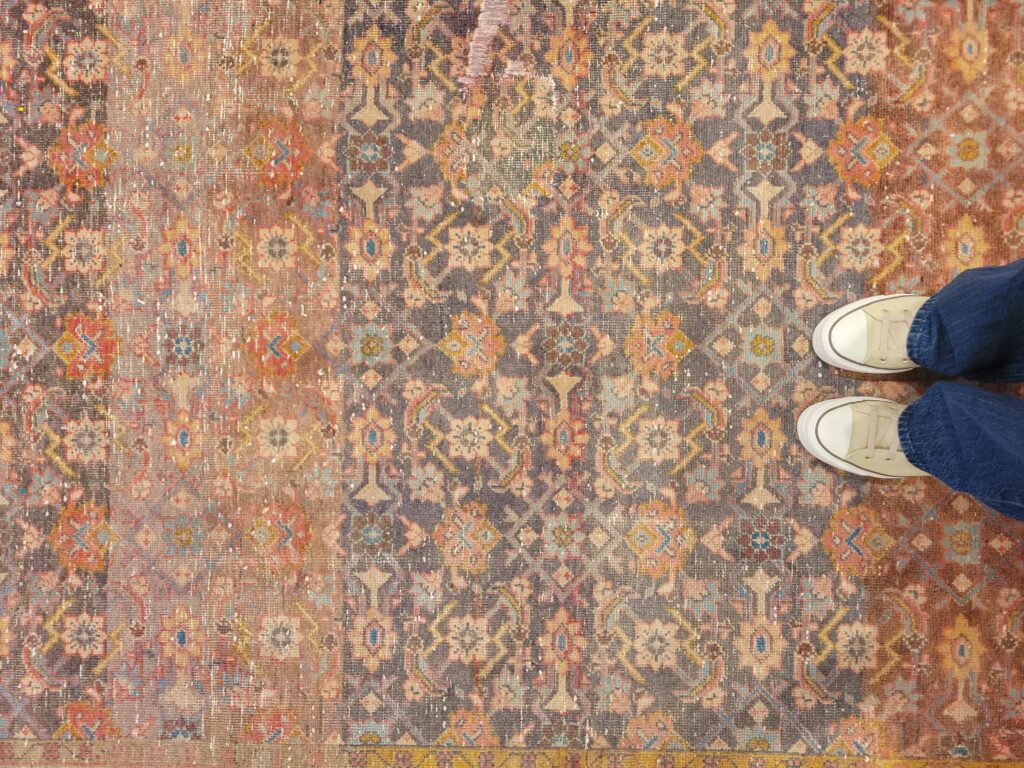
Photo credit: Jayme Muller (taken at High Point Market)
Color Correcting Photos of Textiles
Note that fluorescent lighting often used in showrooms can impact the color of the rug in the photo versus the rug in the showroom. If this happens, you may need to color correct the textile — again, using an app like Snapseed — to get the photo color as close as possible to the product’s actual color.
To do this, use the WB (white balance) tool. In Snapseed, this tool offers auto, manual, or eye dropper options. Linda recommends using the auto option 99 percent of the time. However, if the color white looks off, use the eye dropper option and click on the part of the design that should be white to correct it.
How to Shoot Light Fixtures with Your Smartphone
Given that lighting is often the trickiest part of shooting furniture and rugs, shooting lighting on its own can also be a challenge when it comes to exposure.
Tips to Adjust Exposure When Photographing a Light Fixture
Generally, when shooting lighting, the color and exposure of the background does not matter. The goal is to show the detail of the light fixture without the light source being over-exposed. To achieve this, use the exposure feature on your camera and tap the brightest spot — which is usually the bulb. Then, you can adjust it so that the bulb is darker.
Yes, this will make the rest of the fixture darker, but in some cases, you can still see the detail. If not, use Snapseed or another editing app to brighten the details.
How to Take a Photo of a Light Fixture Mounted on a Wall Versus Hanging
When shooting a wall fixture, take the shot straight on, similar to the tips for hanging rugs above.
When shooting a fixture hanging from the ceiling, the angle is not as important. In this case, it is okay to tilt your phone and also not necessary to shoot directly underneath the light — unless you want to capture a specific shape.
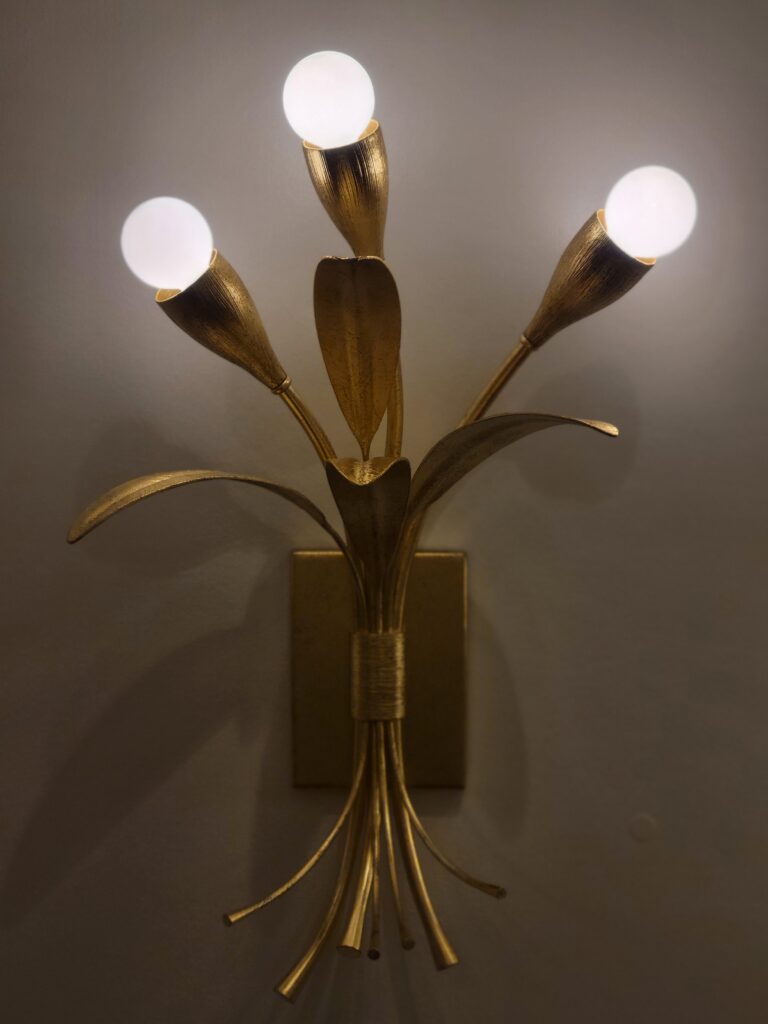
Photo credit: Jayme Muller (unedited version)
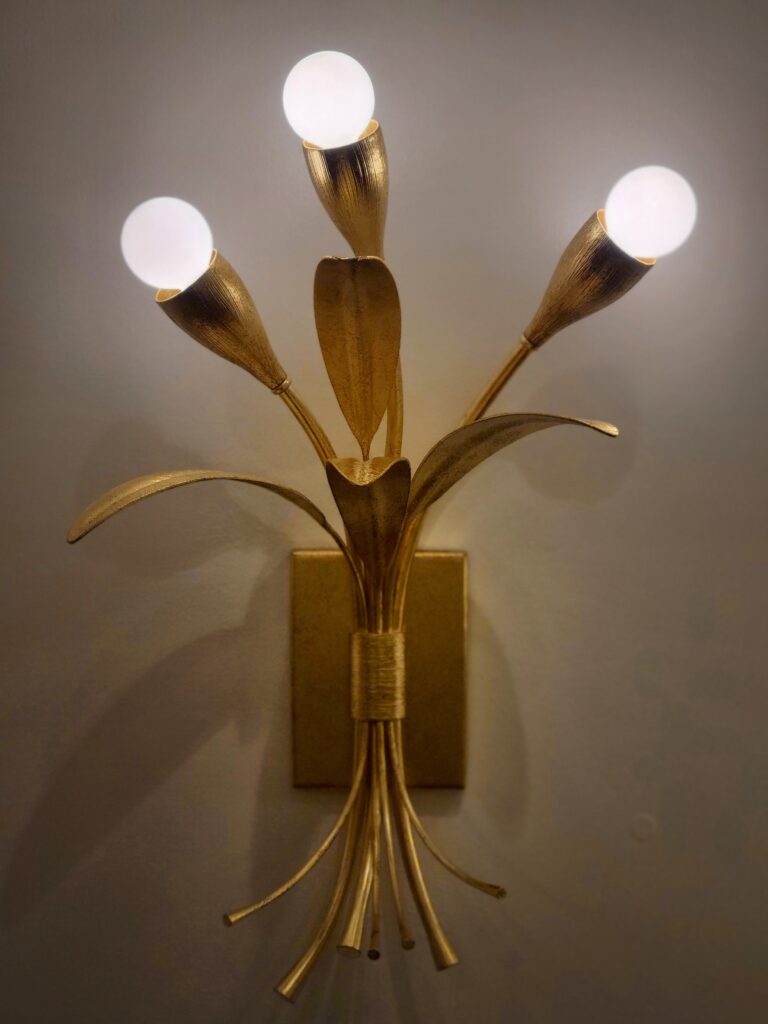
Photo credit: Jayme Muller (edited version)
And there you have it. Tips from a professional photographer to give your showroom photos a professional upgrade without investing in an expensive camera.
Grab your phone and start practicing on products in your store today!
WANT MORE smartphone photography tips? Visit LindaHoltCreative.com and follow Linda on Instagram @lindaholtcreative